Wednesday 20 March 2013

Gaining traction


Things have been painfully slow the past 6 weeks including progression on the bike. However, I did manage to pick up a 1954 Ducati 98 TL for a lowly sum of $250!  

New garage art!   
As of a few weekends past, the weather has been getting warmer, progression on the bike has begun again!
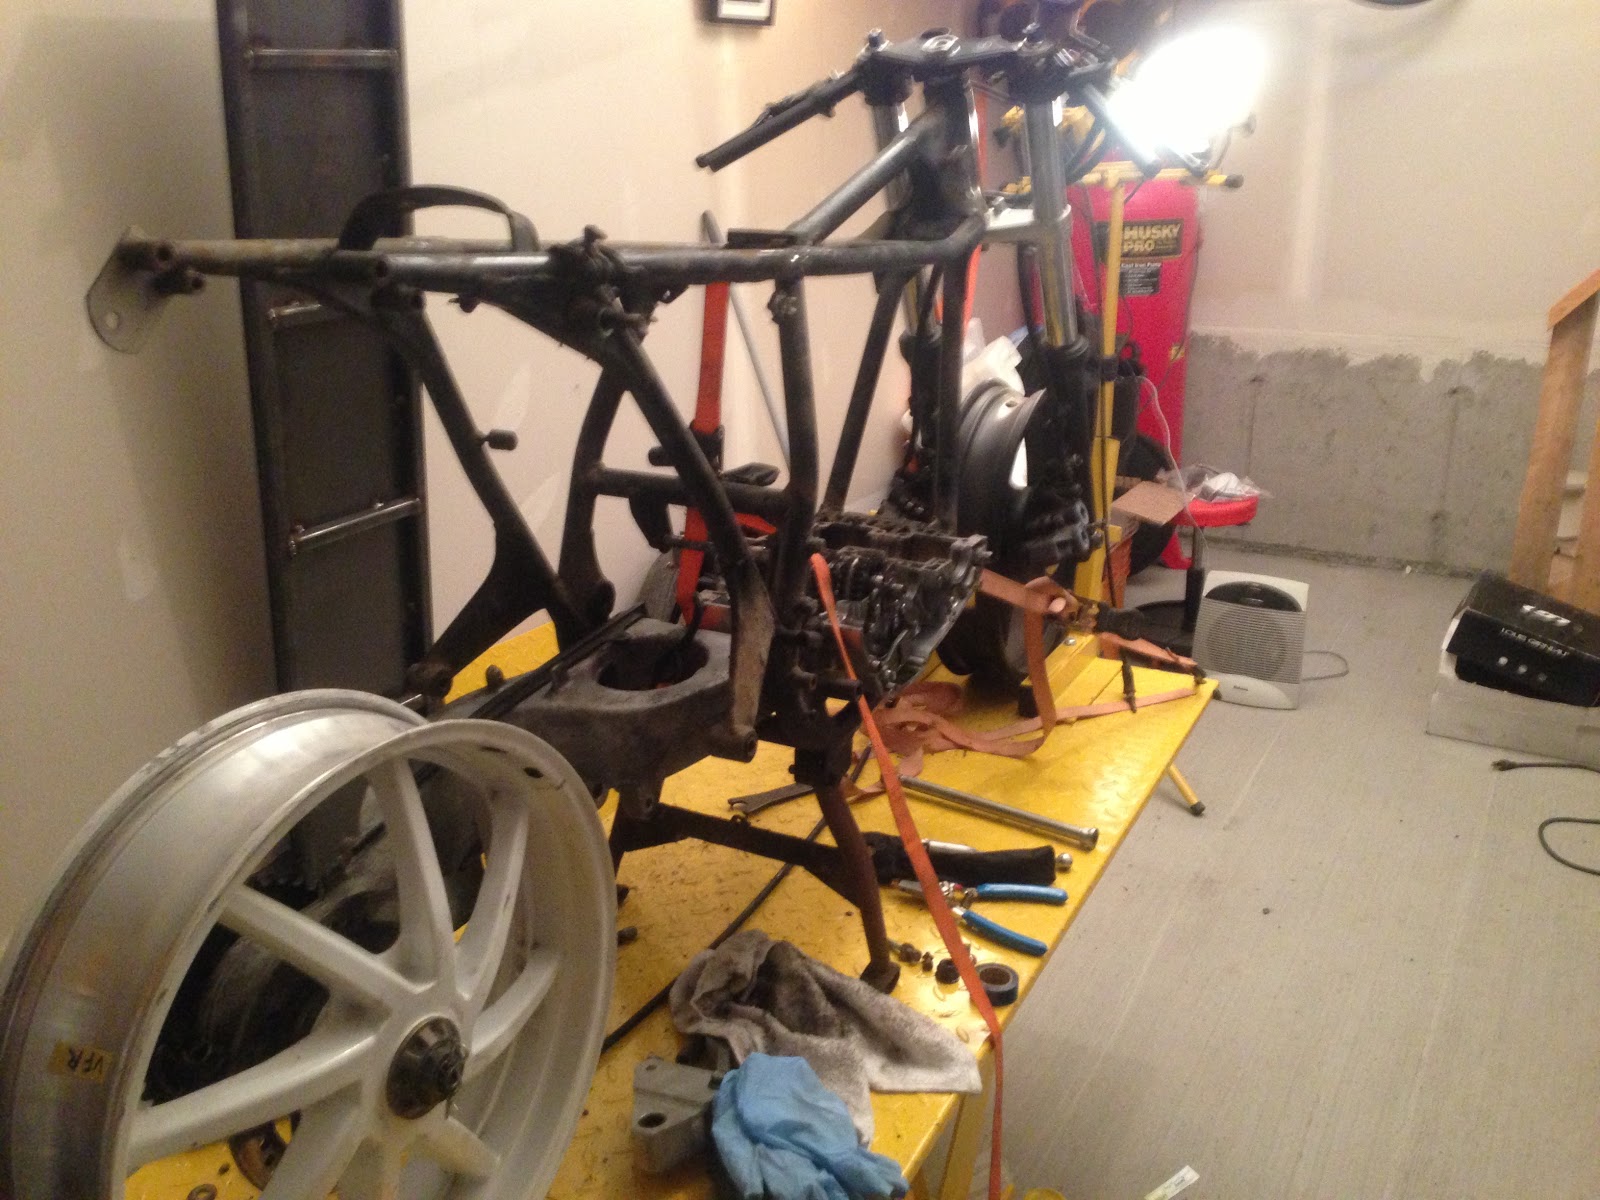
A couple of weeks ago I got a little stir crazy, grabbed the sawzall and hacked off the rear end.  This was the beginning stages of building my own seat loop and changing the shape of the rear end.  Since the bike is a mixture of old school and new school, I've opted for a clean superbike style tail with a smaller support bracket with less angle unlike the rest of the cafĂ© racers you see. A bit of geometry and load calculating, I've figured out the support for the tail will be under the solo seat.  The bike before was designed to accommodate ~350-400 lbs of passenger, and now less than 200…
After spending hours deliberating what seat I wanted on the bike and contacting several vendors on eBay, I decided to make my own. This is my first go at fiberglass, so I hope I don't screw it up too badly! The key to success is not making zero mistakes, but how you react, learn and fix the ones you have made.

I started with some ordinary pink housing insulation foam glued together with 3M Super 77. The 3M spray adhesive was the only one at Home Depot I could find that wouldn't melt foam.  If you ever decide to make your own, keep this in mind!  And let it set for at least 12-24hrs, if not the foam will move and you'll have glue all over your hands and cutting tools (Ask me how I know…)  Thankfully with foam you can recover from mistakes, and if not, just make a new one! My biggest decision was deciding how long the seat and hump were going to be.  This required a tape measure and some imagination infront of the bike. Once I figured, "Ok this is the shape and length that I want"  I headed into the basement and built the seat.  A pen, a few blades and some sand paper can go a long way.
Symmetry to the tank was what I was after. Go figure I could actually get almost all of the angles to be pretty much bang on just from memory! Another go at it to add some more angle to the hump where it meets the seat and voila!
The foam needs some work filling in the holes and divots that I made from, you guessed it, my mistakes.  Live and learn!  Speaking with a friend he told me about the old school method of making surfboards was to put a skim coat of drywall compound over the foam to stop the fiberglass process from eating the foam.  Genius! I needed to fill the hills and valleys in anyways, so away I went!
While waiting for the drywall mud to dry, I tackled the front end installing new Galfer stainless steel braided lines and new EBC HH pads on the front.  New brake fluid will be going in soon.

I also managed to score a tank off of eBay for a good price.  When I got it, I discovered it was in better shape than I could have anticipated! No need to do a tank cleaning or sealing, Score!
 I've become the type to pay attention to the small details when it comes to building bikes.  I'm not a concours builder yet, nor do I think I have the patience to be, but the small things do matter.  For instance, the coil pack. It'll never be seen tucked up and under the gas tank, however I felt that refurbishing the units to make them presentable was required.  Also, someone hacked away at half the wiring harness on the bike, so something needed to be done.
I started with some brake clean to clean off the dust, dirt, grease and grime and ended with these:

 The coils were done in the interim of waiting for my first fiberglass attempt to dry. It turned out much better than I had thought it would.  I have a few bubbles to fix up but for the most part I'm happy with the results. 
Next step is to sand down the rough spots, fix the bubbles, another layer of resin and then gel coat, sand and paint!
Since I started the project I knew I wanted expansion chambers on the bike. No doubt in my mind. Unfortunately for me, they rarely come up for sale. I've found a few companies who do build them still, but at a $600 price tag I've decided Oh hell no!
The next best alternative was to find ones from another bike with similar size etc.  I've hunted eBay for weeks on end searching for pipes. I bid of 3 different sets for a Kawasaki H1 500, and always outbid at the last possible second.  Bastards!
But I did manage to find some on Kijiji, for an H1, and the same Wirges brand that were being sold on eBay.  Only difference, HALF the price!  Awesome! Another tick off the list of things to get. When I got them, they came with the exhaust manifolds. I only discovered them when I was cutting up the box.  I was happier than ever. I had already gotten some steel plate and had planned on making some. This just made my life easier. 
To top it off, the exhaust manifold diameter is exactly right for the GT380, AND the stud holes were almost bang on.  A bit of filing and BAM! They fit!   Of course I had to do a test fit.  I think they'll be awesome!  
I have done my research and know that I may have some troubles with the pipes being that the stroke of the H1's are almost 6mm longer than the GT380, but right now that's not really a concern.
  
    
I've finally gotten around the installing the suspension on the bike and I must say, I'm quite pleased!  It's not done yet,  two more brackets to weld on in order for the suspension cushion to take the weight, but I'd say it's getting there.  Don't mind my welds, they aren't the prettiest, but I clean them up nicely!


That's it for now.  In the next few days I'll have the seat loop made and mounted, the suspenon all attached, seat hump fixed up and then on to mounting the exhaust and the rear sets!
Until next time, keep the rubber side down!  

Wednesday 2 January 2013

Feather Lite

While I've slowly been building Sore Thumb, I've also been collecting parts for my next project Feather Lite.  Once again, this project will be a combination of different bikes all mashed together to give it that perfect look.

I've been lusting for another inexpensive front end.  Ultimately though, I'm looking for a small super light bike.  ie CBR125r, CBR250r, Cagiva Moto, Honda MC18/21 (NSR250) or any other bike that's relatively light and easy enough to get parts for. If you know of any available, let me know!!

The heart of this project is a Honda CR80 motor in which I got a deal I couldn't pass up.  It was an ex shifter kart motor that won the Las Vegas SuperNationals a few years back.  Since then, it got a crank rebuild with bearings, new rod, along with a new piston, renikasiled cylinder, tumbled gearbox and completely ported engine. Along with it being pretty much a brand new motor that had never been fired since its rebuild, I also got an RCE pipe, M4 silencer, 3 stock CDI boxes, a Speed Programmable Ignition, V Force reed cage, coil, engine mount, pump around carb and fuel pump and an airbox.

The motor was prepped by Woltjer, with a claimed 38hp!!   I'll be taming it down to about 30 ish horsepower so the motor lasts a good length of time.

My eyes pretty much popped out of my head when I saw what I was getting for such a good deal. I had a smile from ear to ear that day.


Since buying the motor, I've been mocking up different ideas on Sore Thumb for a rough idea of what I could do in the future.  Don't mind the mess in my garage, I've been working on getting everything completely organized.
I'm going for the super skinny, sleek and small look.  I guess a cafe you might say.

The tank is what I'm styling the bike around. I found it 2 years ago on kijiji for $10. I had slight buyers remorse after I bought it since it sat on a shelf for quite a long time. Now though, I'm stoked that I held on to the tank.

It will need to take a visit to the Dent Doctor to get a few dents pulled, remove some slight surface rust inside, a new gas cap and it came with a petcock.  As you can see from the rear of Sore Thumb, it's super skinny.  I may even bite the bullet and mount the motor on the second GT380 chassis that I have. Unless of course I come across another chassis that gives me a tickle in my special spot!

Until next time, keep the rubber side down!

A New Year's update

Updates have been slow.  Progress has been similar.  I've slowly been amassing parts to complete the build.  I can see the end in sight... about 3 months from now.

Just before the New Year, the entire bike went off to Windmill Motorsports to have the swingarm machined down to be accepted into the chassis, along with a rebuild of the front forks to ensure everything will be perfect for her maiden voyage.
I had a long conversation with Kyle, the owner of Windmill Motorsports, who's a great guy and easy to talk to. He shared many insights into the racing world of Canada and the politics involved.  Interesting stuff... I'm glad I'm not involved!!

Moving over and above motorcycle chitchat, he gave me a great deal and seems to be in it for the love of the motorcycles and for that I am 1, grateful and 2, have great respect for him.

Parts are coming in in a steady stream. The rear caliper and master came in the other day and look solid.  One thing I have found though, is that no matter what you think if you have parts that are coming different bikes you likely are missing something!   Found this out several times.  Starting with the front end that I bought for a song, I was missing a few nuts from the top of the triple tree,  $100 later for 3 nuts, a washer and a rubber gasket!  Ouch!   Same thing appears to be happening with the RVF400 swingarm.  But, as the French say, C'est la vie!


A new-ish BMW S1000rr rear shock and cushion/link is in the mail. Apparently, the shock mates together quite nicely with the RVF400 swingarm. Hopefully I haven't been led astray... and if I have, well it's just money,  Right?!


Next on the list of things to do is to get the paperwork for the bike(s) in line to ensure I haven't gotten myself into a pickle.  I can't see there being an issue.  But in the mean time, I have reached out to my local bike community and once again Ren came to the rescue! 
Ren led me to DoTheTon (http://www.dotheton.com/forum/index.php?topic=2156.0) which has given me a perfect affidavit example.  You have to be signed up to get the file. 
I think I'll be able to get through the registration process and be on my way!

My next installment should have the bike back with the swingarm installed and a chain able to be fitted.

Peace.


Thursday 20 December 2012

Trial and Error

       Not advancing as quickly as I'd like to on the project, but moving steadily. I finally figured out how the engine comes apart.  I thought it was seized together, turns out I had missed a bolt in the sludge!  Go figure.  Next time, clean it thoroughly! And when I think I'm done, clean it again.


        Ren once again came to the rescue and helped me tear the motor into pieces and spill out its innards. Man is she ever sexy inside! Clean as a whistle.  The only pitfall the motor has that I can find is a weak center bearing on the crank. It unfortunately clicks as you rotate it.
Research is key. Since I didn't know how to take a triple crank apart, I set to trolling the internet for resources.  I had come across a great site, Suzuki2strokes.com that specializes in Suzuki street bikes, specifically Suzuki triples. With a few write ups that are on the site, I think I have a fairly good idea of what I need to do.


Tonight I finally got around to taking the original swingarm off the bike and semi mocking up the single sided swingarm to it. Does it ever look like what I envisioned!  She's a beaut!

Now all that's left is to machine either the chassis or the swingarm or a combination of both, down to accept the width the RFV400 swingarm has.  I think it's looking great so far. 

A 2003 R6 front rim arrives Tuesday, which I'm really looking forward to.  On order is a set of Micheline Pilot Pure's 3 rubbers to wrap around the 17" front and 18" rear rim.

Saturday 15 December 2012

Leaps and Bounds


Just before I left on my honeymoon, I had ordered and got delivered the front steering head bearings for the bike.  If you have never heard of them, or haven't checked out their site, go to Allballsracing.com (No I'm not getting paid for this advertisement!).  They have an awesome directory that allows you to match the bike you have with the front end you want to mate to it and get the proper bearing sizes!  No steering stem or neck modifications necessary.   Ecstatic with my purchase I set to installing the bearings on the bike.

Installation was super simple and straight forward. The real pain was not buying the special nuts and washers that hold the triple tree to the chassis when I purchased the front end.  Live and learn. Do remember that steering head bearings need to be packed with grease prior to installation.  If not, it can lead to premature head wear and can be dangerous.


Clip-ons and folding, adjustable levers went on pretty quick with excitement to see some progress on the bike.

Tuesday 20 November 2012

Polished

Stuff is arriving daily!  It's awesome.  Little bits and pieces that I've been waiting for are showing up at my door in record number.  The mail man must be bewildered as to why I have so many packages showing up.

I had some down time and wanted to try out a new polishing wheel I picked up at Princess Auto (Canadian version of Harbour Freight).   The cases came out amazing for being 40 years old! The two before pictures...

 After a little while of polishing, I concluded on the cases looking pretty good I must say.  Granted I have spent several hours on most of the side cases, but well worth the investment. I think the pictures speak louder than words...

Doing a clarity check on the finish... not bad!


Tuesday 6 November 2012

Little Progress Unfortunately...


The project is still on the back burner while I continue to get all my ducks in a row for my up coming wedding in a few weeks. Thankfully though, I have an amazing understanding wife to be.  She knows how much I love to spend time in the garage. It's not as if it's something new in my life,  I've been wrenching for the last 20 years if not more.  A very useful skill my dad taught and I thank him every day for it. We'll be spending time together doing something and she's the one asking me if I'm going to be spending some time in the garage.  Not in the accusatory sort of way either!  What a woman!!


The GT380 has taken a backseat only in the physical sense.  This is my first project where I am 
 completely taking apart a bike and performing significant modifications.

The current list as of late is as follows:
- Total engine rebuild - all new gaskets, seals, bearings and anything that is worn out.
- 2003 Yamaha R6 front end swap
- 1995 RVF400 (NC35) Single Sided Swingarm
- Clip ons
- Folding, adjustable levers
- Throttle cable
- RVF400 rear master cylinder

And the list goes on.   Things arrive daily in the mail.  Good thing I get home before my fiance!
I've spent hours amassing information on the bike and looking at other projects in search of bits and pieces to frankenstein the bike together. Currently on the search for a front headlight and front wheel.   

Wanting to match the RVF400 rear wheel which is 8 spoke, the bikes that have popped up showing promise always end in the same,  Oh sorry, just sold that.   I'm not even being picky either!  I'll take a wheel from a CBR F2/F3, VTR1000 (RC51), VFR750/800/400 or RVF400. Nodice.